Change Your Aga Cooker Lid Liners

If your lid liners are dirty beyond repair or your lid seals are disintegrating and in dire need of replacement, our DIY Lid Refresh is just what you need.

This is a really easy way to freshen up your Aga range cooker and make it look nice and shiny! Pair our lid liners with new rope seals and new insulation and you've got yourself a winner (and less heat loss = lower bills!). You'll need a cold Aga range cooker for this so it's best organised with your next service or a day when you fancy a takeaway.


You'll need:

  • Something to remove the old seals (we recommend a flat head screw driver)
  • Clean up for debris (a hoover or clean paint brush to clean the top plate afterwards)
  • 2 x new lid seals
  • 2 x new lid liners
  • 2 x ceramic blanket cutouts
  • A tube of heat resistant silicone
  • PPE (Gloves, Dust Mask and Long Sleeved Top)

Step 1


Start by lifting the lids and placing a towel or some cardboard on the hotplates to protect the top from any debris and scratches from tools.
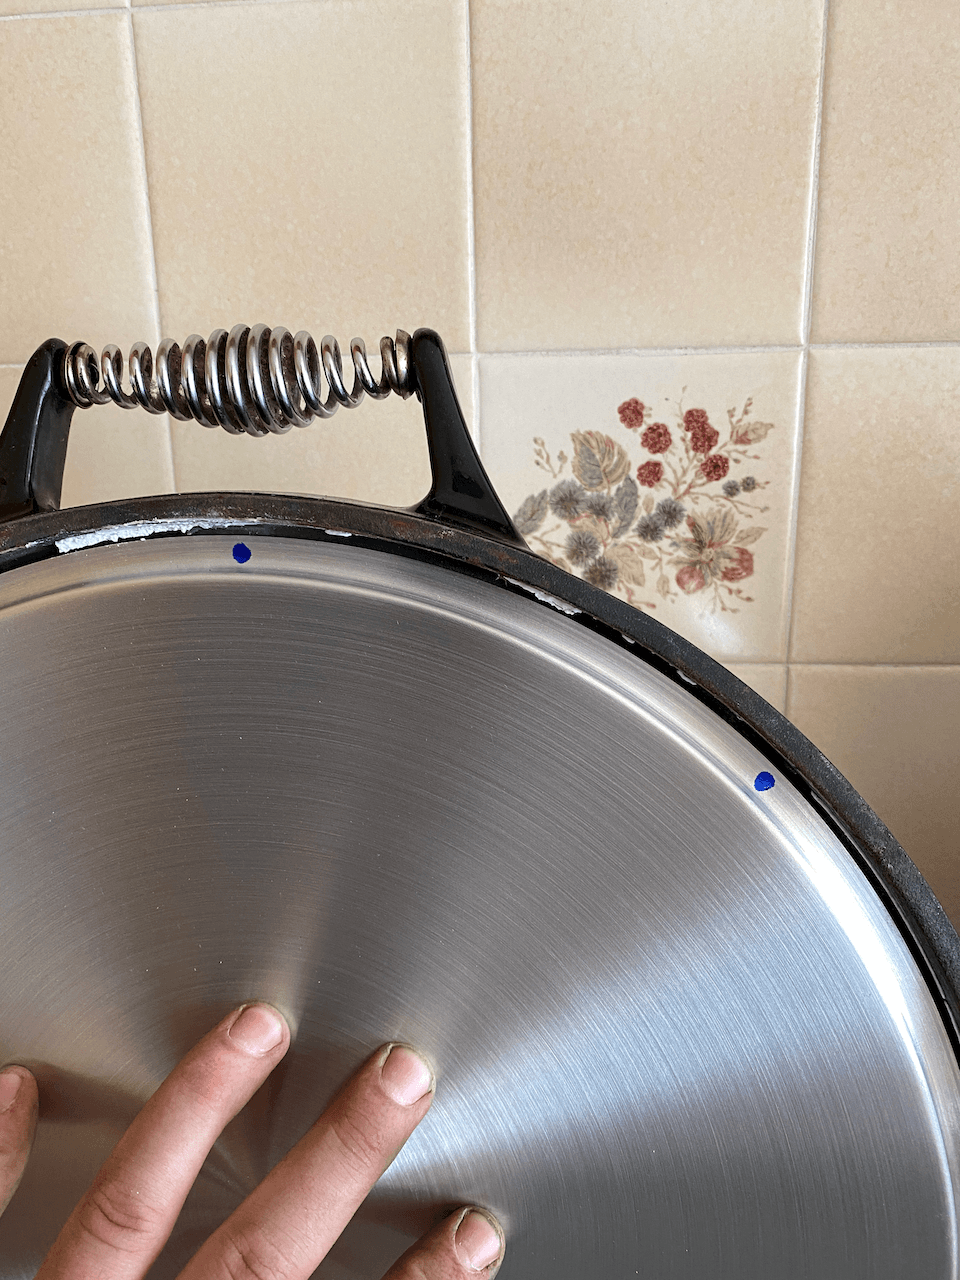

Step 2


Grab your flat head screwdriver and leverage it underneath the old lid seal before it starts to lift. Then gently start pulling it away from the old liner whilst breaking the old seal.


Step 3


Remove the screws that have now been uncovered from beneath the old lid seal. There could be quite a few dotted around the rim of the liner so make sure you get them all. Spray with WD-40 if they are still - be careful not to snap them.


Step 4


Remove the old liner (and 'retaining band' depending on what type you had), then place it aside for recycling. Remove the old insulation from inside the lid.

Step 5


Place the new ceramic fibre insulation inside the lid. You might have to squeeze it in or trim a bit off - this is easily done with a stanley knife or blade.


Step 6


Place the new lid liner into position and use a sharpie etc to mark where the holes are and drill through the liner (if your liner isn't already pre-drilled).


Step 7


Screw the new liner into position then squeeze some heat silicone around the perimeter of the liner, making sure you cover the screws.
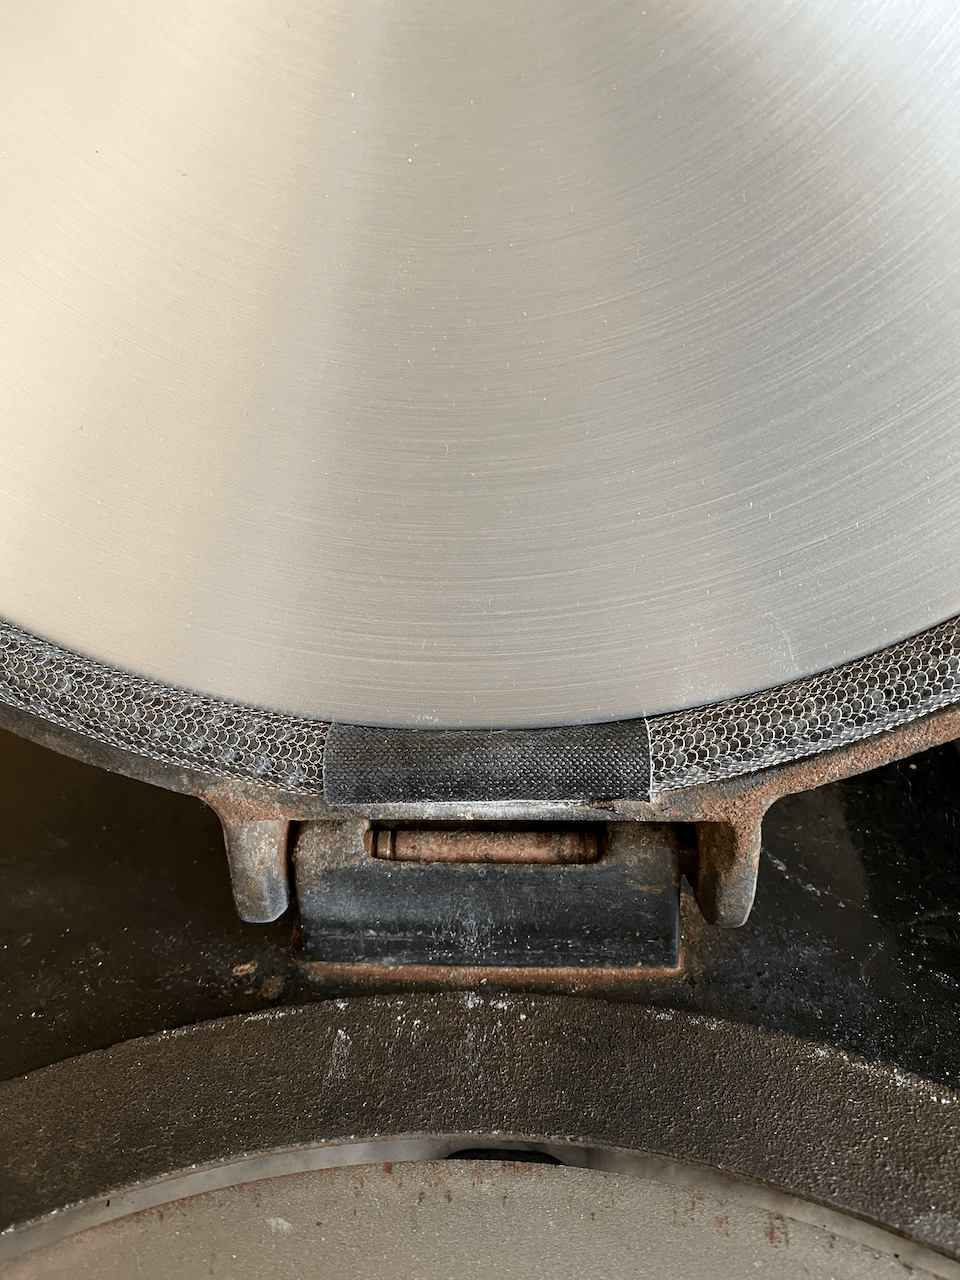

Step 8


Place the new lid seal into place (starting with the joint at the bottom of the lid) then gently press into place all the way around. Be careful not to scratch your new liner or chrome domes with the metal mesh.

Now step back and admire your handy work!


The silicone should be dry in about an hour and once your Aga range cooker heats back up, you might notice some funny smells but it's normal and will quickly dissipate.


We'd love to see your new refreshed lids so please post a photo on our facebook page or tag us!

We're Saltire Cookers.


We specialise in Refurbished Aga Cookers and Electric Aga Conversions to turn older Aga Cookers into efficient, controllable models (without losing the traditional design or radiant heat cooking).


Out of all of our cooker models, the brand new Esse Cookers offer unrivalled cooking experience, and the brand new Everhot Cookers are designed to be 'always on' whilst offering the lowest running costs possible.


More Posts From Our Blog:


by Steven Johnson 25 March 2026
If your Aga Cooker doors have started sticking, or letting steam out of your ovens, they may need a little adjustment.
by Steven Johnson 22 March 2026
If your Oil Aga Cooker has a yellow flame, it needs some attention. Here's some advice on possible causes and solutions!
by Steven Johnson 22 February 2026
Our black steel plinths are available to add onto your cooker order if required. They add additional height to the overall Aga dimensions and are available in multiple heights to suit your kitchen design. Traditionally, these British-made Aga Cookers were 851mm from the base to the top of the black enamelled surface. When do you need a plinth? If your worktop or ideal working height is taller than 851mm and you want your Aga Cooker to match them, you'll need a plinth underneath. Brand new Aga Cookers (as well as our ESSE and Everhot cookers) have a fixed height plinth built into the cooker body. If you need these raised higher, you'll need to lay marine-grade plywood or concrete at the required height before installation. What sizes of plinths are available? Our plinths are available in 50mm to 80mm sizes. They also allow for levelling of the base before the assembly of the cooker begins. How do I choose my plinth size? When choosing your required height, you should consider your finished floor height vs your worktop height. It's standard for Aga Cookers to finish slightly proud of the worktop, since the top plate is curved rather than a right-angle ( photo shown below ). If you were to finish level with the worktop, you will have a bigger 'valley' in-between, where crumbs and debris love to collect! Usually, the plinth is seated onto the subfloor, with finished flooring/tiles ran up to and around the plinth once the cooker is built. Alternatively, you can either seat the plinth directly onto the finished floor/tiles, as long as they can bare the weight of the cooker, or we can raise the plinth using the adjustment legs, to allow the finished floor to tuck underneath slightly ( photo shown below). If choosing this option, you should bare in mind the supporting feet in each corner of the plinth start at around 20mm from the front of the plinth. This means your flooring could run underneath for a depth of around 20mm if preferred. After the cooker is built, there are NO adjustments in height, without a strip down and rebuild. What do Aga Cooker plinths look like?
Load More Posts...