ElectricKit Hotplate Not Working?
If one or both of your 'ElectricKit Conversion' hotplates stop working, we'll help you troubleshoot and find solutions.
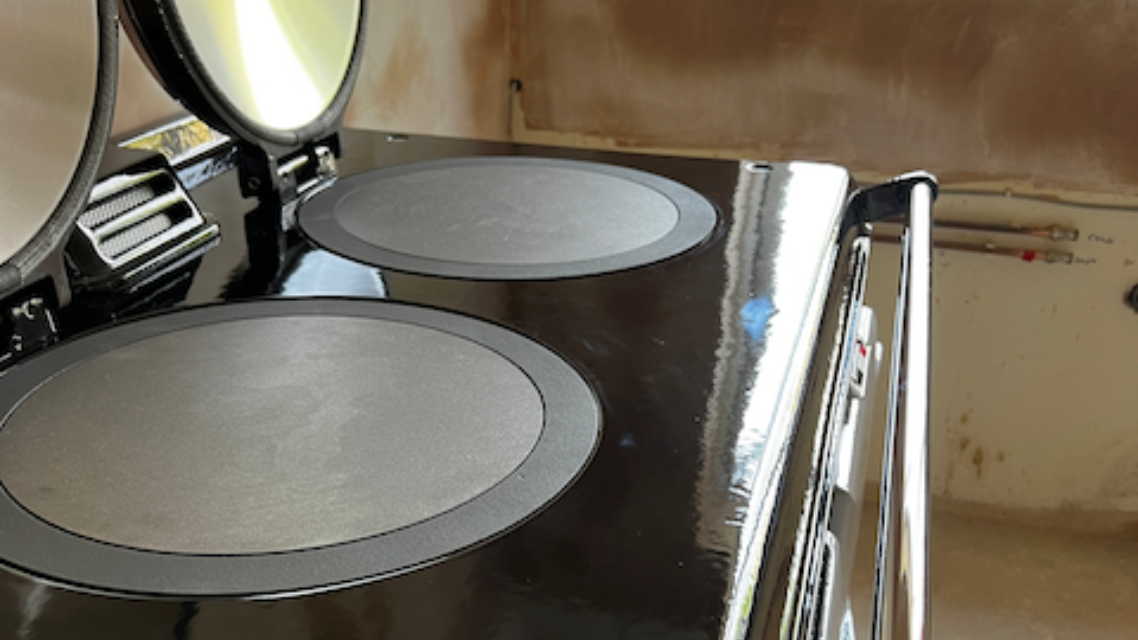
First steps would be to identify your conversion system.
We'll show you some photographs below of the different models over the years, and you can identify yours by matching the control panel to your own.
Remember to limit your hotplate temperature when the lids are closed - leaving them at full temperature can damage the components and require out-of-warranty repairs.

ElectricKit Original (Silver Panel) ⬆️

ElectricKit Classic (Black Panel) ⬆️

ElectricKit Advanced (Touchscreen) ⬆️
The hotplates are a 'drop in' cassette design, and have overheat switches on the side of them. If this reaches a certain temperature, it will activate and turn off the hotplate. Once cooled, the overheat switch would need to be reset before the hotplate can switch on again.
If both of your hotplates have stopped working, check the power to the cooker.
Original (and some Classic) models may have one power supply/plug to the hotplates and one for the ovens. In the past, we've seen some switches accidentally knocked off by pots/pans etc inside the cupboard next to switches.
If one of your hotplates is not switching on, try the overheat reset below.
This guide is for the original and classic versions, but the advanced is similar, the only notable difference is the lack of the cast iron expansion ring to remove beforehand!
It may be obvious, but we have to mention that we can't be responsible for any damage you cause to the cooker whilst carrying out the overheat reset below. If you'd prefer, get in touch and we might be able to quote you for an engineer visit.
STEP 1: ISOLATE POWER TO THE COOKER
You'll be working with LIVE connections, so it's important that you turn off the power!
Turn off the power supply (or both fused spurs) that supply the cooker at the wall. If you do not have switches, go to your fuse board and turn off the power supply to the electric ring main that supplies the cooker. Confirm there is no power to the Aga range cooker by observing that there are no lights illuminated on the control panel, or testing with an electric tester.
STEP 2: REMOVE THE EXPANSION RING (if applicable)
The cast iron versions just lift off, as shown below. If you have a chrome version, it will lift out with the whole hotplate when we move onto step 3. Place a thick towel or cardboard etc right next to the hotplate, to prevent any scratches or damage to your enamel top!.

STEP 3: LIFT THE WHOLE HOTPLATE OUT OF THE TOP PLATE RECESS.
You might need a small flat-headed screwdriver to levy under the rim and get a good purchase on it. Be careful not to yank the hotplate out too far, which might dislodge any wires.

STEP 4: IDENTIFY THE OVERHEAT SWITCH AND RESET.
The small white circular switch with two LIVE red wires connected is the overheat. You'll need to push the white button in the middle which should 'click' when reset. Make sure the wires are secure, then carefully reseat the hotplate, with the cables at a 7 o'clock position (using your open lid as the 12 o'clock position).

STEP 5: RESTORE POWER AND TEST.
Once the hotplate is back into position, turn on the power to the cooker and try heating up the hotplate again.
If it's now working, you can use it as normal - just remember to limit the max temperature when the lids are closed. We recommend simmering temperatures.
If it's still not working, give us a call and we'll help!

More Posts From Our Blog:


